About Me

- Redbutterfly78
- Eigentlich erwachsen aber immer noch vielzuviel Kind in mir ... a big girl but a little girl inside of me
My Blinkie
Ct From


I Use Tube from


Posts mit dem Label Heartbeatz werden angezeigt. Alle Posts anzeigen
Posts mit dem Label Heartbeatz werden angezeigt. Alle Posts anzeigen
Dienstag, 12. Juli 2011
Kiss me....
 10:29 |
 Eingestellt von
Redbutterfly78


Supplies
1 tube of choice - I used the artwork of Ismael Rac
1 tube of choice - I used the artwork of Ismael Rac
here
save in your Mask Folder
This tutorial was created with Lysiras Graphic World - Kiss me kit.
It is available at Heartbeatz Creationz.
save in your Mask Folder
This tutorial was created with Lysiras Graphic World - Kiss me kit.
It is available at Heartbeatz Creationz.
You can visit lys blog here.

*Let’s get started*
Open up a 700 x 700 blank canvas.
fill with lgw_kiss_me_paper10
go Layers-load/save Mask-
load mask from disc-
from the heart Mask 3
select
fit to layer
Deselect Invert Transparency
Merge Group
rename Mask1
new layer
Fill with Paper
lgw_kiss_me_paper01
go Layers-load/save Mask-
load mask from disc-
mask181_sigrid
select
fit to layer
Deselect Invert Transparency
Merge Group
now you go to Selection-
select all-
selection-Modify-contract
8
selection-invert-cut
deselect
go to effects
Alien Skin-eye candy 5 Impact-Gradien Glow
Ghost Text

rename Mask2
Copy and paste Element
lgw_kiss_me_colordrops01 as a new layer
arrange under layer Mask 2
rename deco 1
placement on left top side
Duplicate-
Image- Mirror
Image -Filp
rename deco2
go to layer Mask 2
activate
Copy and paste Element
lgw_kiss_me_ribbon02 as a new layer
placement on left side
dropshadow
0/0
62
Blur 9
rename ribbon
Copy and paste Element
lgw_kiss_me_flower02 as a new layer
resize 50 %
deselect all layers
effects
Reflection-kaleidoscope

Dropshadow
rename flower
new layer
go to your selection tool
make a selection
from the middle of the left flower to the right flower
fill with
lgw_kiss_me_paper02
now you go to Selection-
selection-Modify-contract
15
Cut
rename frame
arrange under layer Flower
merge layer Flower down to layer-frame
Now drag this frame in the picture down
copy your tube
paste as a new layer
placement of your choise
arrange under layer Ribbon
rename tube 1
take your selection tool
Rectangle-make it like me

ctrl-C
add new layer
arrange over the frame
paste into selection
rename tube 2
go to layer tube 1
effects-3d- dropshadow
2/2 100 Blur 18 color #000000
Copy and paste Element
lgw_kiss_me_plate01 as a new layer
resize 50 %
placement of your choise
Merge all layer visible
add name
add artist copyrights
 Labels:

Montag, 11. Juli 2011
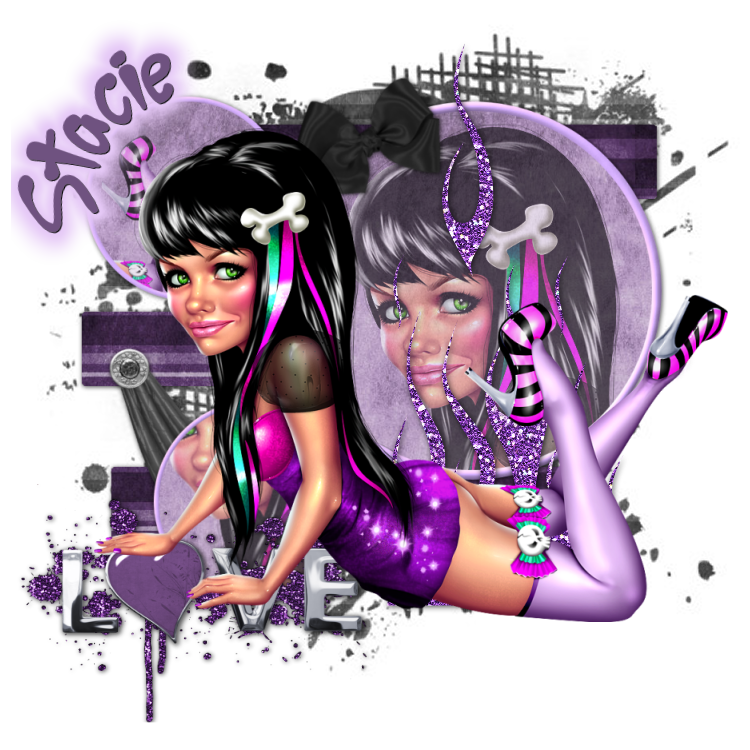
Gothic Romance

Supplies Needed:
PSP
Font of choice
Mask of your choice
I am useing a UFMask13
I dont know who made this mask if you want to use the same mask
you can grab it HERE
save to your mask folder
I dont know who made this mask if you want to use the same mask
you can grab it HERE
save to your mask folder
StacieCakes PTU Kit Gothic Romance
tube of choice
I used
save in PSP and PSD image

Open the template,
Ctrl & D to duplicate and close the Original.
layer copy delete
Fill layer 1-Paper SC_GRP8
dropshadow 1/1 72 blur 9
repeat these steps
by layer 2 & 3
layer 1,2 and 3 merge down
Copy and paste SC_GRE_Drape1
arrange under layer 4
put little to left and rotate
Dropshadow
Layer 4 fill with paperSC_GRP7
Copy and paste your close up image or a part from your tube
as a new layer above the layer4.
Selections/Invert
Tap the delete key.
Deselect.
opacity 60 %
repeat these steps
by layer 5 & 6
but change the part of tube
layer 7
go to adjust-Hue and Saturation-
Colorize
with
Hue 192 saturation your choise
effects 3d -inner bevel
Tap the delete key.
Deselect.
opacity 60 %
repeat these steps
by layer 5 & 6
but change the part of tube
layer 7
go to adjust-Hue and Saturation-
Colorize
with
Hue 192 saturation your choise
effects 3d -inner bevel

repeat these steps
by layer 8 and 9
merge visible the layer 4-9
dropshadow
Copy and paste SC_GRE_Bow1
resize 40 %
arrange over layer 9
put to left side from the frame from layer 9
Dropshadow
Copy and paste SC_GRE_Bow2
resize 20 %
arrange over layer 8
put to right side from the frame from layer 8
Dropshadow
merge all layer visible
resize 80 %
all layer deselect
Copy and paste your tube as a new layer.
Position in front of the picture of your choise
copy and paste
SC_GRE_Flames1
arrange under layer with your tube put little to right
dropshadow
copy and paste SC_GRE_WordArt1
resize a little
arrange under layer with your tube put little to left side
Dropshadow
merge-visible
new layer arrange under layer merge
select all
copy and paste into selection paperSC_GRP10
deselect
layer-load/save Mask-
search UFMASK 13
select fit to layer
invert trancparency
merge visible
add name
add artist copyrights
i hope you have Fun
Abonnieren
Posts (Atom)
My Scrapblog

i use for my Works


Bloghits

Freebies